Sometimes it’s not what you are cooking that’s important, it’s how you cook it. Or, perhaps more to the point, how you prepare it. With some imagination, and quality ingredients, even the humblest of meals can be elevated to a sublime level. Today’s case in point is the Hamburger.

Not your average fast food burger
Billions of dollars are spent world wide advertising mediocre hamburgers, and multi-national corporations have amassed empires worth trillions peddling these mass produced mouthfuls of meat, and in the process we have become desensitized to what potential a hamburger has.
Considering it’s culinary elements, the hamburger ticks all of the boxes. It offers a range of textures, colours, and a full flavour profile which, when done well, is at least the equal of a high quality steak and salad. We have all had the pleasure of eating a quality hamburger, and those restaurants that do them well get away with charging exorbitant dollars for the experience, well here are some tips on how to get the best quality burger at home, and for only a couple of dollars per person.
Where’s the beef?
There’s no surprise in the statement that “a quality hamburger begins with the meat”. The “patty” is the most important part of any hamburger, and the best patties follow 4 fairly simple rules.

Closest to the hoof/horn = flavour
Furthest from the hoof/horn = tender
Rule #1: Flavour. Not all meat cuts are created equal. It’s a fairly known fact that the further from the horn and hoof, the more tender the meat. These cuts do less work, and therefore do not develop the toughness that some of the other cuts do. Unfortunately, the more tender the meat, the less flavour it usually has. Meat that has to work for a living, develops more flavour, at the cost of tenderness. Fortunately for us, the hamburger is mechanically tenderized, so these more flavourful cuts of meat, and less tender, are great for our needs. The other big plus, is that they are typically cheaper. So, when searching for our piece of meat, we are going to look for something cheaper and more flavourful.
Rule #2: Fat content. Fat acts as a conduit for flavours. It is very effective at coating the tongue, and delivering the flavours of the food directly to the taste buds, where it counts. It’s also quite viscous, so it hangs around the mouth and nasal passages doing it’s thing for quite some time after the food has gone. Smell a particularly robust cheese, and you’ll be smelling that thing for 30 minutes or so after you put it away. That’s the fat working within your olfactory system. I will not make a hamburger patty with anything less than 20% fat, and closer to 30% is better. The result is going to be juicier, because of what is effectively internal basting, more flavourful, and the fat content will mean less connective tissue toughness.
Rule #3: Texture. A typical hamburger is boring. All of the meat is ground through a die, and the resultant mince is uniform in size, uniform in texture, and (quite frankly) boring. To make a quality hamburger, create some interest by changing up the texture. I’ll explain more later.
Rule #4: Seasoning. A lot of home made burgers (and plenty of restaurant burgers) fall down in this area. Salt in a hamburger performs 2 key functions. One of which is flavour. The main function of the salt however is to denature the proteins in the meat. This draws moisture out, and helps to bind the patty together. In order to make the patty firm, and help it hold together, you will need roughly 2% of salt by weight. So, if you are making a kilogram of hamburgers (roughly 5 good burgers) you are going to need 20g of salt, or roughly 1 tablespoon plus 1 teaspoon. This is also roughly equivalent to 2 teaspoons per pound of meat. You can almost double the amount before the hamburger becomes noticeably “salty”, and the result will be firmer, but for the sake of risking too much salt to be healthy, stick to 2%-2.5%. Other than salt, ADD NOTHING. Ok, maybe add some pepper, but that’s it. Seriously. No onion, no egg, no garlic, NOTHING ELSE.
Given our rules above, here are my tips for making the perfect patty.
- Use beef or lamb. No other meat seems to offer the right percentage of fat content necessary to make a great burger, and pork is just a bit too delicate in flavour. Sure, you could mix deer or kangaroo with some pork or beef fat, but why? For the sake of simplicity, I would use beef or lamb. If you want to play with more exotic meats, go for it. Make yourself a duck burger. It will be brilliant, and it will be brilliant because you made it from scratch.
- Use chuck steak, or lamb shoulder. It’s the most flavourful cut of meat that has the fat profile we are looking for. I picked up some chuck steak today for $8/kq, and while I might have been able to pick up some 30% fat content pre-minced meat for less, I have no idea what has gone into that meat. Besides, tip 3 is what makes these burgers special.

How much Chuck could a Chuck Norris chuck, if a Chuck Norris could chuck Chuck?
- Use a food processor to chop up the meat. Cut it into 2cm cubes, and drop about 450g (1 lb) into the food processor with the chopping blade on (meat should be just out of the fridge, so cold). Pulse for 10 single second pulses. That’s full one second pulses…you know…one thousand one, STOP. Then give a final 4 second pulse and drop into a mixing bowl. Do the next 450g batch…and so until until all the beef (or lamb) is chopped

And here we see the answer to the riddle above, after Chuck Norris chucked the Chuck.
- Each batch will need 2 teaspoons of salt, and I use cooking salt or kosher salt. It’s coarser, and will not dissolve as easily, which means more denaturing. Add the salt to the meat, then mix it thoroughly. You will know you are doing it right when a coating of fat lines your hands and the mixing bowl. Then, let it sit for about 20 minutes.
- Form the patty. You want good 200g (about 7oz) patties. When you flatten these out, remember that you want them to be a bit bigger than the bun. There are no rules to this however, so if you want them thicker, add more beef. Like a steak, thicker is usually better as you have a bit more control over the cooking.
- The final tip is this, and it’s a doozy. Using your finger, push a hole in the middle of the patty. This will mean that the patty will be cooking from the inside as well as the outside edge, reducing it’s propensity to shrink and fatten. They will hold their shape better if you do this.

Notice the holes in the centre...my wife taught me that. Actually, Jeri usually forms the burgers in our house, for some reason she's just so damned good it.
One of the great benefits of taking the effort to do this is that you now have a hamburger patty that you can cook like a steak. If you want to cook it medium-rare, you can. In fact, I would recommend that you do cook this like you cook your steak. If you like a steak that is a bit pink, and you’ve never had a hamburger done the same way, well…you are in for a treat. It’s making me smile just thinking of the pleasure you are going to have.
Wow, this post is becoming longer than I thought.
Nice buns hun!

Nice buns for nice burgers
The next thing that makes a hamburger special, and it’s really not that far behind the patty, is the bun. The type of bun you choose is tantamount to a great burger, and it is also what I will give you the least advice about. I love a hard crusty bun, but my wife and kids don’t, so it’s going to be about your own preference. Tonight’s meal had two kinds of buns. A soft round bun, and a crunchy diamond shaped rustic roll. Regardless, please do not buy a cheap mass produced seeded hamburger bun.
- Go visit a bakery, and buy something artisan. If having guests, offer a few choices by having several types of buns laid out for them.
- Toast the buns, especially soft buns. Toasting them adds a textural element. If they don’t fit in your toaster, put them under the grill or broiler on high. Just watch they don’t burn.
- If you like garlic, rub the toasted buns with a fresh garlic clove that has been cut in half (rub using the cut end). This step is optional, but will add a garlic note to the hamburger, which I love.
Create magic
When making burgers for the family, I usually go down the buffet path. I slice all of the condiments, and prepare all of the sauces, grate the cheese(s), and fry the eggs and bacon slices, ready for the eater to make their own. When making your burgers, here are some ideas:
- Spread a thin layer of mayonnaise on each side of the cut (and toasted) bun. The mayo adds flavour, but also acts as a waterproof barrier for the bread. The oil in the mayo will help prevent the juice from the patty turning the bun into a soggy mess. Butter or margarine will also work, but add no flavour. A nice touch is to add some horseradish to the mayo. This is the only “required” addition to your burger, in my opinion. Try the burger with nothing else, just mayo and the patty on a quality toasted bun.
Common additions:
- Ketchup (or tomato sauce), well ketchup wont waterproof your buns, and I would avoid it on my burger anyway. If you want some tomato goodness on your gourmet burger, roast some tomatoes (small cherry or grape varieties work best) with some olive oil and salt in a hot oven. Smear the soft roasted magic on your bun, on top of the mayo or butter.
- Lettuce is another optional extra. Please don’t use iceberg lettuce. We’ve worked so hard thus far, don’t spoil it. The peppery flavour of rocket or arugula would be great, as would a nice oiled and grilled/BBQ’d radicchio. Whatever you use, make sure it’s well washed and thoroughly dried. Obviously grilling the radicchio dries it out well enough.
- Cheese is another highly recommended extra. Choose whatever cheese you like, but again avoid cheap cheese slices. Find a nice quality cheese to add to your burger. A smoked cheddar or Gouda, Swiss cheese, Blue cheese, the skies the limit. I personally enjoy a good Blue choose on my burger. In fact, if I am making my burgers out of pre-miced beef, I will often sandwich Blue cheese between two thin patties, and seal the edges making a fat cheese stuffed beef patty. It is frigging awesome, but doesn’t work quite so well with home chopped beef, as the patty is a bit too chunky to get thin enough.
- Bacon…my personal rule in life is that nothing in life cannot be improved without the judicious application of cheese and/or bacon. I am not about to dissuade you from adding bacon to your burger. If you want to turn it into a treat, go find a butcher who makes their own bacon, and try a few slices. It’s a gourmet burger, so no point doing things by half.
Other good optional additions to your burger are:
- Fried egg (it’s an Aussie thing, and it really works. Try it, and keep the yolk a little on the runny side)
- Onions…either fried, raw, or pickled. I love all three, but have a particular weakness for the sweetness of fried onions.
- Mushrooms, sliced and fried. A mushroom and Swiss cheese burger has to be one of my favourite all-time burgers. There is something magical about the combination.
- Pickles are another great addition. Like all of the ingredients we have listed here, quality and freshness is key. You still want the crunch, and the briny sharpness is a good counterpoint to the mayo and beef “juiciness”.
- In Australia, we love beetroot on our burgers, and for good reason. It’s another bright flavour that balances the burger, and also adds a sweetness to the meal. Delicious addition, highly recommended.
- Roasted peppers are one of my favourites to add to a burger, and in particular a large chili like an anaheim, poblano, or ancho. If you like the heat, which I do, a roasted jalapeno is also great on a burger, and a chipotle (smoked jalapeno) is manna from heaven.
Sauces:
- Well, I’ve already knocked ketchup (for good reason), but I wont call the food police if you want to add it to yours. Especially if you make your own ketchup, or choose a nice craft made ketchup.
- Mustard…I think it’s too overpowering myself. Maybe a light dijon or a spread of whole grain, bit I would avoid mustard on a burger.
- Sweet chili sauce is a bit too, well, sweet. Maybe a good home made chili jam would be an alternate to the chili sauce, just be a bit sparing.
- Really, again, there are no rules. Just try to balance the flavours a bit. Sweet chili sauce with a blue cheese burger just sounds a bit odd to me.
I hope that I have inspired you to make your own hamburger at home tonight, or sometime soon, and particularly from scratch, using a piece of chuck steak as your starting point….although, I can vouch for that cheese stuffed burger. Remember, as with most foods, it’s quality in and quality out. You are better using a smaller amount of a better product, any day, and that counts double for food.
If you follow these rules and tips, and take some of the ideas I’ve given you to heart, you will be able to present a table full of the most amazing hamburgers to your family and friends. They are inspired renditions of a humble, and often disdained, meal option, and will serve you will in any company…whether it be chic acquaintances from the local gallery, or mates from the local footy club. Served alongside an aged Cabernet in a long stemmed glass, or a fresh coldie in a pull-top can, your dinner guests will be after seconds and singing your praises for months to come.

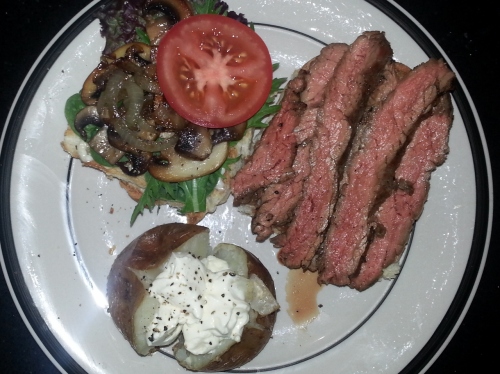
A better presentation than buffet style, for table service
As always, enjoy the meal.
Northlakes


")

You must be logged in to post a comment.