Stuff it…

It’s funny what subjects get under a persons skin (pun intended), and one of those for me is stuffing.

I love stuffing. As an economical side dish for a deliciously roasted fowl, there isn’t much that can top the humble stuffing.

Unfortunately, it can be fraught with danger.

Cooked inside your bird of choice, you need to over-cook the poultry if you want to cook the stuffing buried deep within the cavity sufficiently to avoid a cross contamination bacterial explosion, and I don’t need to paint that picture for you. The problem with that, is you risk ruining your roast.

So, what is the solution?

Don’t cook your stuffing inside the bird.

Normally, I would cook the stuffing separately in a small roasting dish and serve it with the meal fresh from the oven, however this past Christmas, I had a light bulb moment.

COOK AND SERVE THE STUFFING INSIDE A WHOLE PUMPKIN!

Safer than cooking stuffing in a bird, and easy to turn into a vegetarian delight

Safer than cooking stuffing in a bird, and easy to turn into a vegetarian delight

First, select the pumpkin. I suggest a Kent, or a Jap pumpkin for up to 8 people. Using a sharp thin bladed knife, cut the top off of the pumpkin and mark a notch to help align the lid and base later. Now clean out all of the seeds and fiber…don’t forget the lid. At this time you can choose to scrape flesh out to make more room for stuffing, but don’t make the walls to thin.

Fill with your favorite stuffing, bake, and serve!

What’s that? You don’t have a favorite stuffing recipe?

Well here’s one I prepared earlier…

A good stuffing starts with good bread. Use a nice heavy loaf, like a genuine sourdough or Rye.

Cube it up and toss with oil and salt. I also like to add fresh garlic and fresh rosemary, if I have it on hand.

Cook in a moderate oven until golden brown. congratulations, you just made the best croutons you’ve ever eaten. Put them aside, those you don’t eat immediately anyway, and remember this technique for the next salad you make.

Cook some wild rice, per the directions. You won’t need more than 1/4cup uncooked.

Fry some mushrooms in olive oil, with something porky (chorizo, bacon, etc) and a couple of anchovies. You won’t taste the anchovies, just the seasoning they provide. If you don’t want to, skip it…but add some worcestershire sauce later.

Add some diced onion and garlic, and cook until the onion is translucent. At this point, I also like to add some slivered almonds or Pine nuts.

Add in some rosemary, thyme (not much, it can overpower), and some ground pepper.

Deglaze the pan with a little red wine, Port, or Brandy, and cook it down so there is barely any liquid left.

Now add the rice and mix together.

Take the pan off of the heat, and mix in the croutons.

In another pan, or microwave oven, heat up about half a litre of chicken stock until almost boiling. Pour enough into the mix to make it moist, but not sloppy. Taste and season.

Then bake it in a dish, or a pumpkin like above.

Serve it next to a roast chook or turkey, and lap up the accolades (as well as enjoy the stuffing with the generous scoop of pumpkin).

Leftovers? A Tex-Mex feast is in your future…

I opened the fridge yesterday, and looking back at me was the remains of last night’s braised pork roast, and the remains of a roast chicken I bought from the local mega-mart for a quick lunch a couple days ago, and an idea struck me almost instantly.  It rarely happens like that, but this time it was a brilliant plan.

I whipped up a quick enchilada sauce (recipes aplenty on the net, but here’s what I did…

  • 1/4 cup oil (light olive)
  • 1 finely diced onion, but grated is fine (even a couple tbsp dried would work)
  • 2 cloves crushed or grated garlic
  • 1 tbsp plain flour
  • 1 cup tomato puree
  • 1 cup stock or wine, or mixed
  • 1 tbsp powdered cumin (or crush some seeds)
  • 1/2 tbsp powdered coriander (or crush some seeds)
  • 1/2 tsp cayenne pepper
  • salt and pepper to taste

In a shallow frying pan (not a saucepan) fry the onions in the oil until beginning to take a nice rich brown colour.  Add the garlic and fry for about 1 minute.  Add all of the spices and herbs (not the salt and pepper).
Add the flour, and cook for about another minute, before adding the puree and stock/wine.
Simmer until about the thickness of the tomato puree.  Add more stock if too thick.
Taste, and season.

In another frying pan, I added about 2 cups of oil, and brought it up to a low frying temp.

The Chicken

A great snack, or part of a Tex Mex Feast

A great snack, or part of a Tex Mex Feast

Then I chopped up the chicken and added some cheese to it (I used some cheddar I had grated in the fridge, but crumbled feta or cotija would have been better).  To this I added the Mexican spice trinity (Cumin, Coriander, Chilli), and seasoned it with salt and pepper.

Opening a pack of corn tortillas (and they need to be corn, not flour), I dredged them quickly in the hot oil to soften.  Just a few seconds each side.  Then I dropped some of the mix into the middle, and simply rolled them into a tight barrel (about thumb thickness) before placing them seam down on a baking tray.

Setting them aside, I turned my attention to the pork.

The Pork

Slightly over cooked, but bursting with flavour, and very simple to make.

Slightly over cooked, but bursting with flavour, and very simple to make.

The pork was already somewhat shredded from the braise, but if your using a normal roast pork, I would wrap it in foil with some stock or a can of tomatoes, and cook it for a couple more hours to make it shreddable.  Fatty cheap cuts are best, like a shoulder or butt.

Using the corn tortillas again, I dredged them in the hot enchilada sauce to soften.  Then I wrapped the pork mix in a barrel about the size of a golf ball in diameter.  Note I did not season the pork more.  That’s what the sauce is for.

Placing the pork enchiladas in a baking dish, snug but single layered, I then covered them in the remaining sauce, spreading it evenly.  Top the dish with some cheese, and maybe some sour cream at this point (though I added the sour cream at serving).

The Cook

Cook the Enchiladas covered for about 10 minutes, then uncover and add the taquitos to the oven.

Cook for 15 minutes, or until the taquitos are a nice light golden brown.

Remove from the oven, and rest for 10 minutes before serving.

Serve them with shredded lettuce, diced tomato, diced onion, some cilantro, cheese, a home made guacamole, and sour cream, all nicely presented in separate bowls for people to help themselves.

It’s a simple meal, thrify if you want to just use leftovers, but good enough to do from scratch as a purpose meal.  It’s amazing delicious, and you’ll look like a food hero in front of your friends and family…of just make a ton of taquitos to enjoy with a cold beer while watching the football!

Pita Pockets – A Healthy Choice for the BBQ

Pita Pockets or Kebabs are a great fast food alternative.  They’re fresh, healthy, and packed with great flavour.  Making them at home is not only easy, it’s delicious, and very easy on the budget.  These are ideal for hot day, or for when friends drop around.  There’s nothing more social than people constructing their own dinner using the ingredients you have laid out.

Traditionally these would be made with lamb, but here is a recipe for a chicken version which is lighter, but still very more-ish.

Fresh, healthy, and delicious.  Chicken Kofta Pita with Couscous

Fresh, healthy, and delicious. Chicken Kofta Pita with Couscous

Chicken Kofta

  • 1kg Chicken Mince (I would use breasts or thighs chopped up in a food processor)
  • 1 medium onion, finely diced or grated
  • 1 egg
  • ½ cup breadcrumbs
  • 20g Salt (or a seasoning like Vegeta)
  • 1 tbsp, or about 3 cloves, grated or crushed garlic
  • 1 tsp chopped rosemary
  • 1 tsp ground sage
  • 1 tsp ground cumin
  • ½ tsp ground coriander
  • ½ tsp dried thyme
  • ½ tsp dried chilli flake

Mix all of the above ingredients and form into large thumb shaped (and sized) pieces, or wrap them around a kebab stick.  Chill in a fridge for about an hour.  Fry or BBQ until done.

Tzatziki

Controlling the amount of moisture in a tzatziki is critical.  Suspending the natural yoghurt bundled in muslin (or a clean chux cloth) over a container to catch the excess water makes a “labneh” which is a bit like a zesty and creamy feta.  Alternately, you can blend a 50/50 mix of Danish style feta with Greek style natural yoghurt or sour cream.

Blend the following:

  • 1 cup of the labneh, mentioned above
  • Squeeze ½ cup grated cucumber wrapped inside a cloth or paper towel to remove moisture
  • 1 clove crushed or grated garlic
  • 1 tsp ground cumin
  • ½ tsp ground coriander
  • 1 tbsp lime juice
  • Salt to taste

Harissa

I love Harissa, but my family are not a huge fan of capsicum flavours.  It’s a great size dish to flavour boost anything, like a sambal might, or a punchy Mexican salsa.  Tonight it’s served on top af a couscous.  Here is an adaptation that I think is packed with flavour.

  • 2 long mild chilli’s or a roasted capsicum (can buy them preserved in jars or cans), finely diced
  • ½ finely diced or grated onion
  • 3 anchovy fillets, finely chopped
  • 1 tsp Cumin
  • ½ tsp ground coriander
  • ¼ cup red wine
  • 2 tbsp tomato paste
  • 1 tbsp Worcestershire
  • Salt to taste
  • Dried chilli flakes to taste
  • ½ cup olive oil
  • Chopped fresh basil or mint

Fry the onion, anchovy, garlic, and diced chilli with the cumin and coriander over a medium heat until the onions are soft.  Add the red wine and cook until almost all the wine has evaporated.  Stir in the tomato paste and worcestershire sauce and continue cooking for about 5 minutes to cook out the paste and develop the flavours.  Taste and season.  Add basil or mint and drizzle in the olive oil while stirring to incorporate.

Couscous

  • 1 cup couscous
  • 1 cup boiling water (or stock, you can use a cube or seasoning powder)
  • ¼ cup almond slivers
  • oil or butter
  • Toast the almond slivers in a pan until lightly golden

Add the couscous and almonds to the boiling water/stock (season with salt if using water).  Stir quickly and cover with a lid, removing from the heat immediately.  After 2 minutes, add the oil/butter and stir with a fork to fluff it up.

Putting it all together

Slice up some cucumber, tomato, and onion. Chop up a fresh lettuce, and mix with chopped parsley and coriander.  I also like to add some sliced avocado, but that’s me.

Slice open some pita bread, and stuff it with the lettuce mix and cucumber/tomato/onion (as you like).  Add the chicken kofta (you could use falafel for a vegetarian version).  Sauce it with the tzatziki.  To take it from a fast food snack to a meal, serve it with a side of couscous topped with a flourish of harissa.

Mega Death Sauce

So I love chilli’s, and hot sauces are a staple for me.  I really enjoy starting the day with some eggs drizzled with a kicking hot sauce, but I have never categorized myself as a chilli head.  Maybe I’m in denial.

Anyhow, my wife returned from taking number 1 son to a Rugby tournament this weekend, and brought me home some Mega Death sauce, one of the range of Hot Sauces offered by Blair’s (out of Ascot Vale in Victoria).

Mega Death Hot Sauce- Love the Coffin packaging.

Mega Death Hot Sauce- Love the Coffin packaging.

I can confirm, it’s hot.  Very hot.  In fact, here’s hot potent it is:

I dabbed a drop onto my finger to taste it, and it performed as you would expect, the burn was immediate, then blossomed into something more.  It might not have been the hottest I have tried, but as a measure of it’s flavour (yes there was one mixed in with the tongue numbing heat), I was immediately inspired to come up with some recipes for the sauce in various concentrations.  But I digress.

The next morning, despite eating a full meal of Spag Bol and Salad, and taking a nice hot shower, I rubbed my eye with the offending finger…it still burned.  That’s how well this sauce lingers.

Anyway, the important this is that this is a great hot sauce.  Not just the searing heat, but the great blend of fruitiness, smokiness from chipotle’s, and spice gives this a delicious palette.

Here is their website, so check them out, I can really recommend the Mega Death (it’s the only one I’ve tried).

https://www.deathsauce.com.au/index.html

In the mean time, what is your favourite recipe that has hot sauce as an ingredient?

Strawberries – A shot of Summer

Wimbledon begins today, and other than the Tennis, nothing screams Wimbledon more than a bowl of sweet fresh Strawberries.

You can almost feel the warm glow of sunshine just looking at these beauties.

You can almost feel the warm glow of sunshine just looking at these beauties.

Very easy to grow, it is a fruit that seems to capture the essence of Summer more than any other, and no fruit seems to find it’s way into more sweets and preserves.   Prolific even in small pots or hanging planters, no garden seems to be complete without strawberries painting daubs of red in amongst the green.

Ice creams, jams and preserves, or fresh atop a pavlova or cheese cake, everyone has a favourite use for the strawberry.  I find it’s combination of sweetness and tartness pairs beautifully with salted pork, and like cranberries with turkey, strawberry jam and ham are a match made in heaven.  But for the freshest fruit picked at the peak of the season, nothing beats strawberries with lightly whipped or clotted cream…except maybe the following.

Strawberry Liqueur

  • 1 kg strawberries (you can use frozen if fresh are unavailable)
  • 750g white sugar
  • 400g water (a splash over 1.5 cups)
  • 1/4 cup lemon juice
  • 1.2l cheap Vodka (or everclear diluted to 40% abv/80 proof)

Remove the greenery from the strawberries, and halve them before adding them to a large pot.

I said remove ALL of the green stems...

I said remove ALL of the green stems…

Add the sugar, lemon juice, and water.

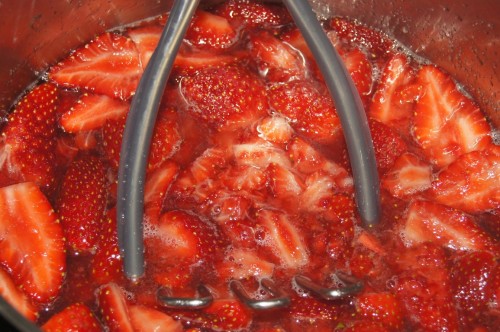
Use a vegetable masher to give the strawberries a head start.

Crush the strawberries using a vegetable masher to give them a head start.

Bring to a slow boil and then simmer for about 40 mins, or until the fruit has broken down into a pulp.  Do not let the mix boil too rapidly, and make sure the pot you’ve used is large enough.  It can and will boil over the rim of the pot and make a horrible jelly mess all over your stove.

Strain through a fine sieve.

Using the back of a spoon will help get most of the juice from the pulp.

Using the back of a spoon will help get most of the juice from the pulp.

Discard the leftover pulp.  You can use it in a smoothie or on ice cream if you like, but it will be quite seedy.

Allow the mix to cool, then add the vodka.  Decant the liqueur into bottles.

This will make about 2.5 litres of roughly 20% abv liqueur, which makes it superb for cocktails, or a sweet shot all by itself.

Of course, a twist on a Wimbledon tradition doesn’t hurt anyone.  Pour a 3/4 shot into a shot glass and top with cream.

All England Club, eat your heart out.

All England Club, eat your heart out.

Genuine Mexican Delicacy: Chilli Relleno’s

When I mention the words “Mexican Food”, what comes to mind?  Nachos perhaps, covered with melted cheese, guacamole, and sour cream?  Crunchy tacos filled with mince and lettuce, topped with cheese and a salsa?  Maybe Fajita’s (pronounced fa-hee-tahs), with sizzling strips of beef or chicken served on a warm flour tortilla with grilled onions and capsicums?

Sadly, wrong on three counts.

Mexican food is one of the most loved foods in Australia at the moment, yet in truth, we’re actually eating Tex/Mex food…not original Mexican fare at all, and I think it’s time we all learnt a little bit more about true Mexican cooking (and perhaps a little about some of the pronunciation).

The fact is, Mexican cooking is something we can and should all adopt.  Authentic Mexican food is not born from modern kitchens and closely guarded recipes or techniques.  It traditionally makes the most of the cheap cuts of meat from old animals that served duty as egg layers or beasts of burden, so Mexican food makes delicious use of cheap ingredients using simple techniques and very little kitchen trickery.  Its a food that is ideal for the household on a budget, and these days, who isn’t?

Mexican food is more corn than flour…ground maize (or masa) that is formed into a dough (for tortillas; pronounced tort-ee-yah) or a cake (for tamales) and used to carry tid bits of slow cooked cheap cuts of meat, or to soak up the flavours of a punchy mole (pronounced mol-ay) or sauce.

Mexican food uses foods that are readily available, and therefore cheap to find.  Small amounts of slow cooked shredded beef, pork, and chicken (meat and offal) is what you’ll find on taco’s and inside burritos, not minced meat and not choice steak, and you’ll almost always find it served with a hunger buster like beans or rice.

Seafood is used more often that you think, with much of Mexico’s population living along coastlines.  Fish and shellfish are as likely to be in a stew or taco as shredded chicken.

And of course there’s chillies.

So Mexico is famous for hot food, no doubt, but not all chillies are hot…and many Mexican dishes rely on the flavour of the chilli itself, rather than the heat it may bring, so there are many dishes that use varieties of chillies (or peppers) that have little or no heat at all.   On the mild side are Capsicums and, if you can find them, Pobano’s and Anaheims…also called “Bull Horn Chilli’s” in Australia.  Hot Chillies are usually used sparingly, to add a zing to normally delicate dishes, while the milder chillies are used whole, as an ingredient or vegetable/fruit in it’s own right.

Look for chillies that are longer and narrow, rather than ball shaped.

Look for chillies that are longer and narrow, rather than ball shaped.

Which brings me to my most favourite of all Mexican dishes.  It’s a dish of stuffed chilli’s, usually stuffed with a mild melting cheese (traditionally queso, a Mexican cheese, fried in an egg batter and served with a smooth salsa or a Mole.  It’s as easy to cook as it is sublime to eat.

Chile Rellenos (pronounced re-yen-nyohs)

  • Look for chillies that are longer and narrow, rather than ball shaped.  Larger is easier, smaller works too.  Try Bullhorns for mild…Jalapeno’s (pronounced Ha-leh-pen-yohs)if you’re more adventurous.
  • Make a slit in them and extract the seeds.  Try to keep the slit as small as possible, but large enough to do the job.
  • Blister the peppers in a scorching oven, or over a gas flame, and place them in a plastic zip bag to steam a little.  You really want to blacken the skins here, it makes a big difference.
  • Remove when cool, and gently scrape the skin off.  It should peel off quite easily.
  • While they’re cooling, think about a stuffing.  It’s a great use of leftover rice, or you can simply use some mild cheese.  The key is not to overpower the flavour of the chilli.  It’s a delicate dish.  Gently stuff your chilli’s with your stuffing, and set aside.
  • Separate a few eggs, about 1 for every two small to medium chillies, and beat the yolks with a generous pinch of salt until light.  You can add some corn flour or rice flour to the yolks too, it will help with the final batter, but just a tablespoon or two.  Now beat the whites, with a splash of white vinegar, until peaks form.  Stir in half the whites into the yolk mixture to combine.  Gently fold the yolk mixture back into the remaining whites.  You want to maintain as much volume as you can.
  • Put a frying pan on the stove, medium heat, with about a 1cm layer of neutral oil.
  • Dollop some of the batter into the pan into a shape and size that matches your chilli.  Now put your chilli to bed on this batter.  The batter will keep it off of the bottom of the pan.  Cover with another dollop of the batter and shape (or add more) until the chilli is completely covered.
  • Cook until the bottom is browned, and turn over, cooking until the flip side is brown.
This method is a revelation.  Master this and you'll be egg battering everything.  It's is fool proof.

This method is a revelation. Master this and you’ll be egg battering everything. It’s is fool proof.


When done, serve with a nice salsa and a dollop of sour cream.

When done, serve with a nice salsa and a dollop of sour cream.

Some other tips for authentic Mexican?

  • Slow cook your meat for your tacos and burritos, and try chicken (pollo) or pork (carnitas).  I cannot say this enough.  Ditch the mince!
  • Look for Corn Tortilla’s, not flour.  Maize is Mexican…wheat not so much (it’s also gluten free folks).
  • Play with chilli’s…even mild ones have amazing flavour.
  • Use shredded cabbage on your taco’s, not lettuce.
  • Try fish or prawns on your Taco’s…in fact, prawn tacos (or tacos de camarones) are by far the best tacos you can eat.
  • Make your own salsa!  Don’t buy the stuff in jars…it’s just rubbish  Use google for some ideas if you need, the results are amazing.

Remember, you don’t have to eat expensive to eat well.  Enjoy a Mexican feast today, and maybe even throw a Mexican themed party and try some authentic South of the Border cuisine.

Fusion Cuisine

Some days I can wander the aisles of a grocery store for ages, trying to get inspiration for the meal ahead, whilst other days I wake up with a meal plan already formed.

Today was the latter, and all day I could not think for the Mexican feast that I had planned for that evenings meal.

Taco’s are a perennial favourite in our household, and tonight would not disappoint.  In addition to the taco’s however, I was fixated on making some enchilada’s.  Whilst the Taco’s were going to be made from minced beef, which is what the kids love most, the enchilada’s were going to be chicken.

With that in mind, I popped into my local butcher to pick up a brace of chicken thighs and minced beef, and while I was there I purchased a couple of legs of lamb for the weekend.  To furnish the rest of the meal, I visited the local mega-mart and tried to get in and out in as little time as possible.

Of course, Coles chose to be less than cooperative.  When making enchilada’s, only corn tortillas hit the spot, and they had none.  There is little more frustrating than being let down by the grocery store when it comes to the sole reason you were visiting in the first place.  Funnily enough, yesterday the item out of stock was milk…of all things.

Steaming, and wanting to dump my groceries and head to the local competitor, I walked past the tortilla’s one more time when the rows of “mountain bread” caught my eye.  Thin square flat breads, made to use as a wrap for all manner of “sandwich” options, I quickly realized the potential when I spotted the corn version.

Enchilasagne was born.

Think lasagne, with alternating layers of chicken with enchilada sauce, and cheese with sour cream.  Each layer separated by a thin square piece of corn flat bread instead of the traditional pasta sheet.

What is your favourite mashup of foods to come up with something unique?

Budget Brilliance – Part 1 “Steak on a shoestring”

When it comes to meat, and particularly beef, there are a few truisms that everyone should know.

  • The more a muscle works, the tougher it is to eat, BUT the more flavour it has.
  • The closer to the horn and the hoof, the more work the muscle does.
  • Tough cuts of meat should be tenderised before eating.  This can be done mechanically (mincing, chopping, perforating), chemically (acids: marinades, or enzymes: kiwi, papaya), or by cooking for extended periods of time.
  • Tender cuts of meat are expensive, whilst tough cuts tend to be cheaper.
  • Restaurants buy the best of the tender cuts, leaving the public to fight over the second grade leavings…whilst quality tough cuts can be found for a fraction of the cost.

So, knowing the best way to tenderise a tough cut of meat will mean you can not only save plenty of dollars from your beef budget, but you can get the best of the the most flavourful options available.  It’s a win-win situation for us all.

Let me introduce you to what is arguably (though almost certainly dollar for dollar) the finest steak that you can buy.  When the purse strings tighten, and I have the kind of hunger that only a steak can satisfy, there is only one cut of meat that I turn to.

Skirt Steak.

Skirt Steak comes from the cows diaphragm, so it is a muscle that is used every second the beast is alive.  The unique qualities that make skirt steak so attractive is that the muscle fibres are uniform in direction, and long in design.  This means that whilst the steak is tough as old boots, thanks to it’s constant use, it is also very easy to mechanically tenderise…and it has flavour in spades.

  • You can see there is a little surface fat, which can be easily trimmed, but very little marbling. Skirt Steak is very lean, and great for heart health.
  • The fibres (running the length of the steak, and vertically, are very distinct and easily recognised. This is important later.

Step 1, and possibly the hardest step, is to find your Skirt Steak.  Granted, it’s not the most popular of steaks on the market (despite my loud, but singular efforts), so don’t count on your local box grocery store to have any.  Hit up a local butcher instead.  If quality meat is what you want, you should be building a healthy relationship with your butcher anyway, and buying your meat from a source that knows it’s stuff.

Step 2, bring the meat to room temperature, and fire up your bbq.  You want a heat source that is as hot as you can get it.  You can cook this indoors, but I’d recommend a cast iron pan, 20 minutes preheat on a max burner setting, and several gas masks for the smoke you are about to produce.  For me, it’s a flat out BBQ preheated to pizza oven or tandoor proportions.

Step 3, trim and season the meat.  There can be an opaque membrane left on the muscle, and you should do your best to remove this.  Trim the fat off as well, if you so desire.  As for seasoning: I use cooking (or Kosher) salt, and little else.  The salt will help draw a little protein ladened moisture to the surface and assist in the creation of that tasty crust.  Note, this DOES NOT SEAL IN THE JUICES.  That is a cooking myth.  It does, however, taste delicious 🙂

Step 4, prepare a place to rest the meat after it’s cooked.  And by prepare, I mean chop up some fresh herbs with a little garlic, oil, and salt/pepper.  By laying the freshly cooked meat on this when resting, you will do more to add the fresh herbal goodness to your steak(s) than by trying to add them prior to cooking.  Also have a sheet of aluminium foil ready.

Step 5, cook the meat.  Medium rare is best (in my opinion), and it is not the thickest piece of meat on the market, so it wont take long.  My preference is to cook for a couple of minutes on one side, then rotate the steak 90 degrees to allow the criss-cross pattern to form.  After another minute, turn the meat over and repeat.

Step 6, rest the meat.  This is probably the most important step in affecting the final result of the meat.  Rest it for at least 10 minutes, and even 15 if you can.  Use this time to make a salad, or prepare your other dinner elements.

Step 7, the slicing.  This is the critical stage that will turn your shoe leather into butter tender slices of steak.

  • Look at the steak, and note the direction of the grain.
Well rested, you can see the juices that have reabsorbed into the meat.  It makes me hungry EVERY time I look at it.

Well rested, you can see the juices that have reabsorbed into the meat. It makes me hungry EVERY time I look at it.

  • Using a large sharp knife, slice thinly (5mm slices) ACROSS the grain.  Lay the beef on a cutting board in front of you, with the grain running left to right, and slice vertically (at 90 degrees) to the fibres.

There is nothing left to do but enjoy the steak.  I promise you that this is a dish to try at home.  Whether you cook it for yourself, your family, or a crowd of friends, you will be seen as a food hero when you lay this platter out.  And just what is the best way to enjoy the results?

Watching your weight?  As healthy as it is delicious.  Unless you include the baked potato...in which case it's a little more delicious than healthy!

Watching your weight? As healthy as it is delicious. Unless you include the baked potato…in which case it’s a little more delicious than healthy!

A classic use for skirt steak, and delicious in  anyone's language.  Just add guacamole, sour cream, and saute'd onions and capsicums.

A classic use for skirt steak, and delicious in anyone’s language. Just add guacamole, sour cream, and saute’d onions and capsicums for world class Fajitas.

There is a bun under there somewhere.  A steak sandwich is about as Aussie as it gets.

There is a bun under there somewhere. A steak sandwich is about as Aussie as it gets.

Back – New Beginnings

To those who have subscribed to my blog, I want to apologize for the unexplained, and unexpected, hiatus.

In short, here is the last eight months (in brief):

  • Got asked to vacate our rental house, 3 months prior to the proposed completion date of our new home.  Contract ended, and the owners did not want to extend for a short period.
  • Chilli plants got dumped all over the verandah (thanks to the dog), none survived…but we won’t quit that project quite yet.  Look for a sequel soon.
  • Purchased a small (old) caravan and rented a shed to live in for the short 3 months until the house was finished.  This ended my blogging due to not being able to cook much of anything (except BBQ).
  • 3 months became 6 months, as weather and labour delays cost us dearly.  Christmas was spent in the shed, instead of a new home.
  • End of January, and our house was completed…at least the building.  Landscaping to come.

So now we are in a new home, and I have a nice space to start cooking again, it’s time to bring back the blog.

Thanks to those who have sent me messages.   The good news is that I am now contributing the occasional column to our local newspaper (The Daily Mercury, in Mackay Queensland).  The next entry will serve double duty as my submission to the paper…but here it is the directors cut.  The newspaper version will likely be shortened for space.

Grow your own Chilli’s – Week 2

Last week, I wrote a post about my ambitious attempt to plant 15 varieties of Chilli’s, bedding down 4 seeds of each for a total of 60 plants.  What I am going to do with 60 Chilli plants, should they all be successful, is beyond me, especially as one of the varieties will grow to be 4 metres tall and produce more than 20kg chilli’s in a season (and I planted 4 of these seeds too).  I guess those who have followed my blog thus far have realized that I am not one to think things through to their conclusion much of the time.

Still, the start of week 2 is here, and what an exciting week 1 it was!  It was way more exciting than watching grass grow, which is odd because here there was not even any plants to watch grow.  That was, until this morning…but more on that later.

It turns out that I really do need to water these things daily.  The paper egg cartons are a great idea, but they wick the water away from the soil very readily, especially with the ocean breeze blowing across them.  I learnt very quickly that a 2 day watering cycle wasn’t going to work.  Not only were they bone dry at the time of watering, but one occasion I found one of the cartons on the floor, contents partially spilled.

I am not sure if it was the wind that blew it of the table, I actually doubt it, or whether it was some wicked local animal playing mischievous games with my crop.  Number one suspect is my English Staffy, Brunson, but he denied any knowledge.  As you can see by the photo, however, he is hardly a dog to be trusted.

Brunson: Suspect #1, can’t be trusted.

I recovered about 4 seeds from the mess, and given the bulk of the soil was still in the cartons, I am pretty sure that most of the seeds stayed in the carton.  I did replant the escapees, and topped up the lost soil, so let’s hope that tray sprouts some time soon.

Today we are going to reveal the seeds planted in tray 1.  The seeds in tray 1 were given to me by Cecil at work, and I am not 100% sure of the actual varietal.  I can only go by what he has described, and maybe make some assumptions.

Tray 1, with 3 kinds of chilli’s

As it so happens, tray 1 is also the home of my first sproutling.  This morning, when I opened the cartons to water them, I noticed one of the seeds had burst forth a pale green shoot.  Very excited, especially as I didn’t expect any action until mid way through week 3.

My first chilli!

Seed #1:  Round Red Mild Chilli.

This is the seed that has sprouted for me already.  If it is as described, I will probably save these chilli’s for one of 2 uses:  stuffing (with a cream cheese mix) or pickling.  From the description, it is either a Pimento (very mild) or a Cherry Chilli (mild).

Seed #2:  Mild Bell Chilli

So, to me, this is a capsicum, or Bell Pepper.  It may end up being something more similar to a pimento, which is pretty much what I imagine Seed #1 to be, given the vague description given to me.  This blog entry is rapidly going down hill!  If it is the Pimento or Cherry Chilli, I’ll be looking to do the same as seed #1.

If it is a capsicum, I will be eating these raw…or roasting them and preserving them in oil.

Seed #3:  Long mild chilli

Again, a very vague description that could mean anything, however I am thinking they are the generic “Red Chilli” and “Green Chilli” which is common in mega marts around here.  Quite mild, i’ll be using them to give flavour to salsa’s and mild curries, as well as using them for Taco night, given the kids are not exactly chilli heads.

Pickled Chilli’s
(recipe courtesy Jamie Oliver)

  • 600gr / 1lb 5oz medium green chillies
  • 15 black peppercorns
  • 5 bay leaves
  • 2 tablespoons coriander seeds
  • 5 teaspoons salt
  • 6 heaped tablespoons caster sugar
  • 1 litre / 1 3/4 pints white wine vinegar or rice vinegar

Stuffed Cherry Peppers (or Pimento’s)

  • 100g chopped and seeded Kalamata Olives
  • 100g soft goats cheese
  • 50g plain yoghurt
  • 1 lg garlic clove, minced

Blend ingredients and stuff the chilli’s.  Serve raw.  Pickled chilli’s can also be used here.

or

  • 150g cream cheese
  • 100g dried apricots, diced fine
  • 20g slivered almonds, toasted
  • pinch salt

Blend and stuff into chilli.  Wrap chilli with bacon or proscuitto, and bake in a hot oven until tender.

Stuffed Cherry Peppers

Next week we’ll cover the seed that have been planted in tray 2.  Hopefully i’ll get a few more sproutlings, and hopefully my wife will remember to look after whilst I am out of town this week, lol!

As always, enjoy the meal.